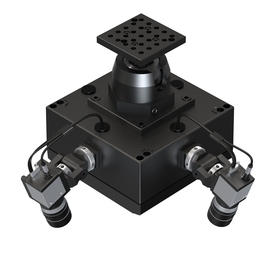
Saccade Vision develops a novel three-dimensional machine vision solution for highly precise and fast three-dimensional measurements and inspection. We simulate the way human vision works, by "zooming" into important information on the measured part and by disregarding the non-useful information. . Our machine vision provides the coordinate measuring machine level of precision at a rate of hundreds of measurements per second.
Our Representatives
Saccade Vision solution includes two main components: a unique smart hybrid 3D sensor and flexible and autonomous software. Employing our proprietary, patent-pending technology, we simulate the way human vision works, by "zooming" into important information on the measured part and by disregarding the non-useful information. This unique approach allows us to perform highly precise and fast three-dimensional measurements and inspection by focusing only on critical locations and increase machine vision robustness on various materials and in different lighting conditions.
Our machine vision provides the coordinate measuring machine level of precision, resolution, and robustness at a rate of hundreds of measurements per second, making it ideal for the inline process control. Moreover, the solution can be installed and programmed by a non-expert in machine vision using an automatic conversion of a digital model of the inspected part (for example CAD drawing) directly into the machine vision solution. This autonomous approach helps to cut application development time from weeks to hours.
Saccade Vision concept is based on the use of some prior knowledge (for example, CAD model or detailed 3D scan etc.). This prior knowledge is analyzed by the Saccade Vision engine. The engine extracts (from this digital information) basic shapes and optical characteristics of features of interests and creates an optimal 3D data acquisition plan (how, where and when to illuminate the object and how, where and when to collect relevant reflected data), so that the high quality data from every feature of interest is acquired in an optimal and fastest way. The engine also ignores all locations on the part that are not among features of interest. More specifically, the engine matches the best light pattern(s) scanning methods for the requested task.
This approach allows us to reach an effective local resolution of an equivalent of up to 100M data points per frame without efforts required for the full field-of-view measurements.
As a result, customers may achieve the level of precision of the coordinate measuring machine (CMM) using fast optical measurements, have such equipment integrated to get 100% inline quality control. Moreover, this solution extremely important for the high-mix manufacturing allowing fast machine setup, rapid new product introduction and fast ramp up.


